Showing posts with label Fusion Extensions. Show all posts

Wednesday, March 10, 2010

Some Serious Extensions!

She wanted to have the longest hair possible so we did 24 inch extensions.. a few days later we did cut some inches off because that is just crazy long - but here are the photos.. enjoy!

before and after:

before and after:

before and after:

before and after:

before and after:


How fun is THAT!?!

Monday, September 29, 2008

Extensions Again..

I love extensions!

So, this client had fairly long hair to start with but it had been over-layered (not by me) and so the ends looked thinnish and we added about 3 inches in lengh as well as compensating for the layering.. here's the before:


and the after:


Here's another BEFORE:

More AFTERS:


Impressive, I know..
You know you want some too!
ps. this only took me about 3 hours.. I think that's like a record for me!!!

Wednesday, September 17, 2008

Extension Love!

So today I got to do something I LOVE: extensions!

This client had had some extensions put in in California with a system that uses these things called "linkies" which basically clamps the extension hair to your own hair using a metal clamp or link (hence "linkies"). The difference between linkies and my fusion method is that the linkies are metal clamps that have sharp corners.. I feel they can damage the hair just from the wear and tear of the sharp corners - and on top of that, my client wasn't really told how to care for them properly ..she wasn't given a good brush for getting down to the scalp (SO IMPORTANT).

She said the second time she had them touched up in California, they just took some out and put new ones in. here's a close up photo of one of the matts left over after removing the metal clamp.. not as clear as I would have liked:


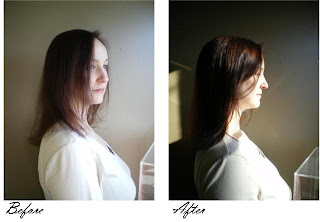
To avoid getting matts and tangles in the hair between where the extension is bonded and the new growth, it is important to brush the hair, down to the scalp (scalp to ends), three times a day. Since the extention will hold in the hair that is naturally shed, some tangles are inevitable the longer they are left in, but brushing three times a day reduces problems with matting. Enough on the technical stuff, let's get to the fun stuff! Here's the before and after shots:


So much fun! I LOVE extensions!!

Thursday, February 28, 2008

More Extensions Photos

I made these progressions things from the session with Kat. I'm interested to see how they are working out so far - Kat, if you are reading this, do tell!


Monday, February 25, 2008

Extensions For Thicker Hair

So, I had this bright idea last time I colored Kat's hair: to use her as an extension model for my website and this blog! I proposed the idea and she was very excited about it.. Hooray.

Kat is the perfect candidate for getting extensions for fuller, thicker looking hair. Her hair is generally in good condition (we put a color gloss on it every 8 weeks and she takes good care of it between colors), the only thing is she can't get it to grow past her shoulders because it's too thin looking on the ends. I set her up for a 4 hour block of time today and we did before and after photos: FUN!

I colored Kat's hair as usual on Saturday and put in a few extension strands without pre-treating or pH balancing, just so she could get a feel for what they would be like. I expected them to all fall out by today, but not a single one did so I have high hopes the "real deal" (ph balanced etc) will hold up wonderfully! I removed the ones I had put in Saturday (they were the wrong color anyway) and did the before photos, then I applied the extensions (which took about 3 hours) and then we did some after photos. Then I used a curling iron and styled it up with some sass and Kat is off to Chicago! We made a follow up appoinmtent for two weeks and I will remove the extensions if she decides she doesn't want to keep them in any longer. The hardest part of extensions is getting used to having them in your hair and not being able to just run your fingers through it.. Kat described it like "having tiny shoelaces in your hair" and that is a great way to describe the bonds. Here's a photo of what the bonds look like up close:

and here's the before after photos...
Back before, back after extensions and back styled:


Left Side Before, Left Side After Extensions, Left Side Styled:


Right Side Before, Right Side After Extensions, Right Side Styled:


Front Before, Front After Extension and Front Styled:


and last but not least a very happy Kat!!

Please see my website to read more about the care and maintenance of extensions:
Extensions at Lynn's Website